
Changing the color of your heading, menu items and site title, only on one page in Brine (7.0)

Let’s set the scene:
You’re working on a client site and adding some great banner images, for indexes and regular pages alike.
You want to make things more immersive so you choose to set the top banners to fill a good part of the screen and have the navigation bar on top of it without a background.
And then, you come across a problem…
As it turns out you have some darker images on a few pages and lighter images on others.
And your menu items, site title, and heading are completely unreadable over some of them.
The problem is, you only get to choose ONE overlay text color through the Style Editor for all the banners, so unless you go with a random color that contrasts both types of images, you may have to settle for changing the backgrounds entirely.
Unless we quickly CSS the problem out.
Making text color changes on just ONE page in Brine
Let’s say we have two pages on our test site; one has a darker image set as a banner and the other one a lighter one:


As you can see, on the first one with the turtle image we can clearly read our site title, heading and navigation items.
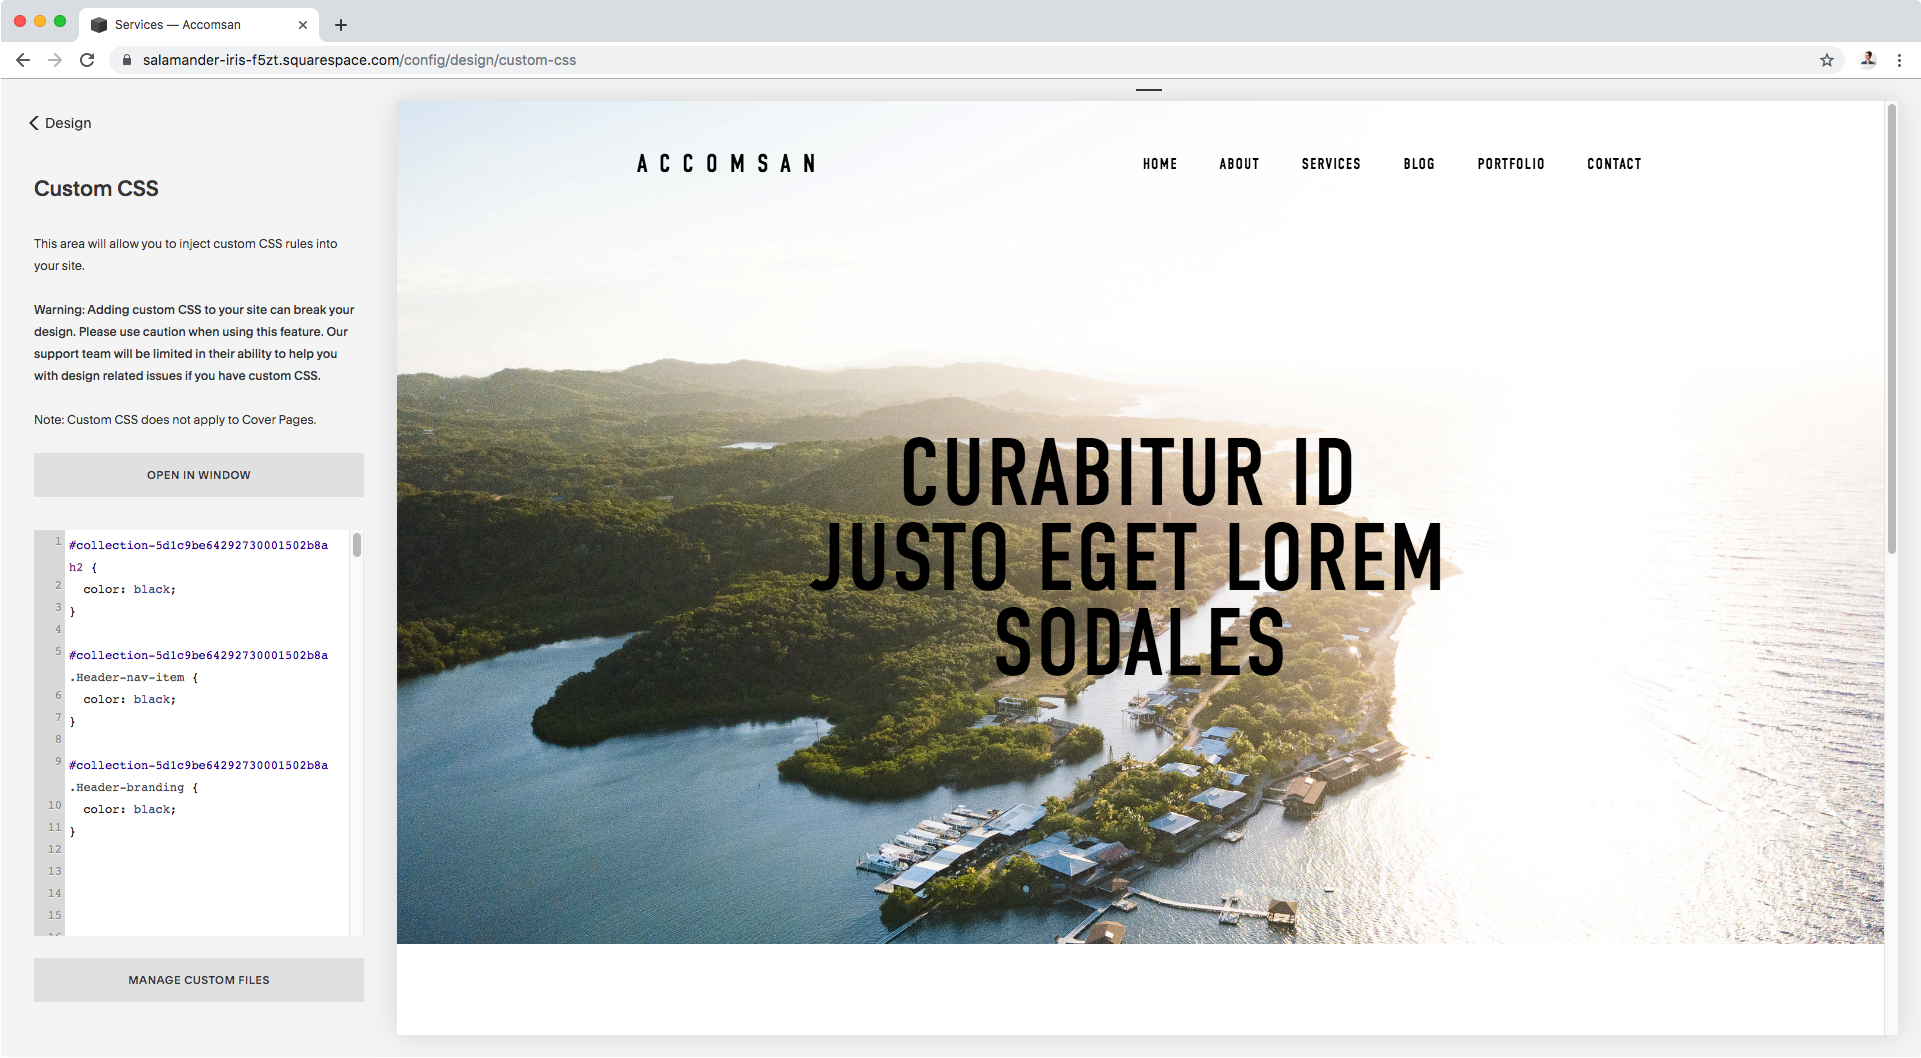
Unfortunately, we can’t say the same for the second one with the landscape background.
The thing is, if we alter the Overlay color option we get through the Style Editor and set it to a darker font color, then the text will be less visible on the first screen.
So, let’s target the text we want to change through CSS instead!
Changing the heading color
Since I’m working with a regular page here, and not an index, I’ll be using my trusty page ID to make sure I’m only changing the color of my heading for THAT page.
Note: you can learn how to find your page ID here!
I’ll pop that ID in my CSS window, along with the type of heading I’m using (h2 in this example) and the font color I want:
#collection-5d1c9be64292730001502b8a h2 {
  color: black;
}

Nice! That was quick, right?
Ok, let’s move onto the next part.
Note: this method would alter the color of ALL h2s on the page, I only have one so it’s no problem. If your page has more than one of the same kind of heading you’re looking to restyle, I suggest using an index page instead to be able to target the section through its URL slug instead of the page ID and be able to isolate the heading you want to change more easily!
Changing the color of your menu items
Before we get started, keep in mind that to achieve this it doesn’t matter if you’re using an index page or not. We’ll still need to use the page ID in either case.
So, let’s take a look at what our nav items are called to see how we’re going to target them:


Alright, we can see they have a class of .Header-nav-item, perfect!
All we have to do then is create our selector with the same page ID we used before (after all we’re on the same page) and add in our menu item class:
#collection-5d1c9be64292730001502b8a .Header-nav-item {

}
And now, let’s simply change the font color!
#collection-5d1c9be64292730001502b8a .Header-nav-item {
  color: black;
}

Awesome! We can now see our menu links!
Let’s finish this up, shall we?
Changing the color of your site title
Same as before, it doesn’t matter if we’re working with an index page or a regular page. We’ll need the page ID to make this happen.
Note: keep in mind this CSS trick is possible when you’re working directly with the Site Title, and NOT when you’re using a logo image.
As always, let’s check what our site title is called to see how we can target it:


Found it! It has two classes, but we’ll go with the first one called .Header-branding.
Note: wondering why we’re not using the other class? Briefly: 1) that class (.sqs-frontend-overlay-editor-widget-host) only shows up when you’re looking at your site on edit mode, so any styles we add to it wouldn’t work on a live site; and 2) it doesn’t seem to be strictly attached to the site title as it has no keywords that refer to the logo, so we can’t be sure it’s not being used on other elements.
Let’s pop that in our Custom CSS window along with the page ID we’ve been using so far.
#collection-5d1c9be64292730001502b8a .Header-branding {
  color: black;
}
Perfect!
Let’s check out our two pages and compare:


As you can see, all color changes were applied only to our lighter-background page while the other one remained untouched.
So there you have it!
Now you know how you can adjust the text color of your headings, menu items and site title on just ONE page of your site, with a tiiiiiny bit of CSS.
I hope you found this useful!
Until next time,
B.
Full code
/*TO CHANGE HEADING 2 COLOR ON ONE PAGE*/
#collection-5d1c9be64292730001502b8a h2 {
  color: black;
}

/*TO CHANGE NAVIGATION LINKS COLOR ON ONE PAGE*/
#collection-5d1c9be64292730001502b8a .Header-nav-item {
  color: black;
}

/*TO CHANGE SITE TITLE COLOR ON ONE PAGE*/
#collection-5d1c9be64292730001502b8a .Header-branding {
  color: black;
}