
Add multi-line descriptions to any Gallery Section in Squarespace (7.1)

In today’s post, I want to show you a super easy workaround to display a title AND a short description in your 7.1 Gallery Section captions!
This little trick works for all of the different Gallery Section layouts, but we’ll be breaking down the logic behind the tweak for the Slideshow: Reel layout.
You’ll find the snippets for the other gallery types at the end of the post!
Sounds good? Then let’s jump right in.
A word of warning
As with other tricks that involve adding HTML tags to Squarespace’s editor fields, there’s always the risk that the modification may stop working in the future if there’s an update that removes the ability to add the tags in the first place.
This has happened in the past with Gallery Blocks, so it’s something to keep in mind when deciding to apply the customization to a client’s site!
Now, that being said, why don’t we take advantage of the fact that it IS doable right now?
The missing requirement
Starting out with a Slideshow: Reel Gallery Section, we have an image that carries a short description/title in its caption:

Let’s add another line of text, so that we have the first one as our title and the second one as the description:


Everything’s bundled up at the moment, but with a bit of CSS we could make the distinction much more visual.
However, there’s a problem.
If we take a look at our text inside the Inspect Element tool…


…we can see that both phrases are inside the same paragraph of text.
That means that there’s no way to differentiate or point to just part of that content.
To fix that, what we need to do is wrap our selected text within another set of tags.
That can be <strong> tags, <em> tags or <span> tags.
I prefer going with <span> tags just because that won’t add any sort of style to the font, so let’s go back to our caption and wrap that second line with them:

And now, at first glance, we can see the same result we had before:

But, if we take a closer look through the Inspector tool…


…we can see that our p element is now split into two!
It now contains a span element where our second line of text lives, giving us the ability of pointing to it via CSS.
Styling the new description line
To target our new span through our Custom CSS window, we’ll need to include a class that specifies where it’s located (since span on its own is WAY too generic) and which Gallery Section type it belongs to (so that no other layout gets modified).
Starting from our element and moving upwards in the HTML structure…

…we can see that the p element is a parent container with a class of .gallery-caption-content.
That tells us that the span is inside the gallery caption, but it doesn’t really say anything about the TYPE of gallery it belongs to.
So, moving up a bit more…

…we come across the great-grandfather of our span.
This figcaption element has a class of .gallery-caption and another of .gallery-caption-reel.
Now, that second one is much more specific!
It tells us (and our browser) that the span belongs to the caption of the reel gallery layout.
Perfect! Let’s build out our selector with that:
.gallery-caption-reel span {

}

And, let’s test out that our selector works by giving our second text line a display of block and a top margin of around 20px:
.gallery-caption-reel span {
  display: block;
  margin-top: 20px;
}

Did you see that shift? It works.
Awesome!
Now, all that’s left to do, is style our second line however we like!
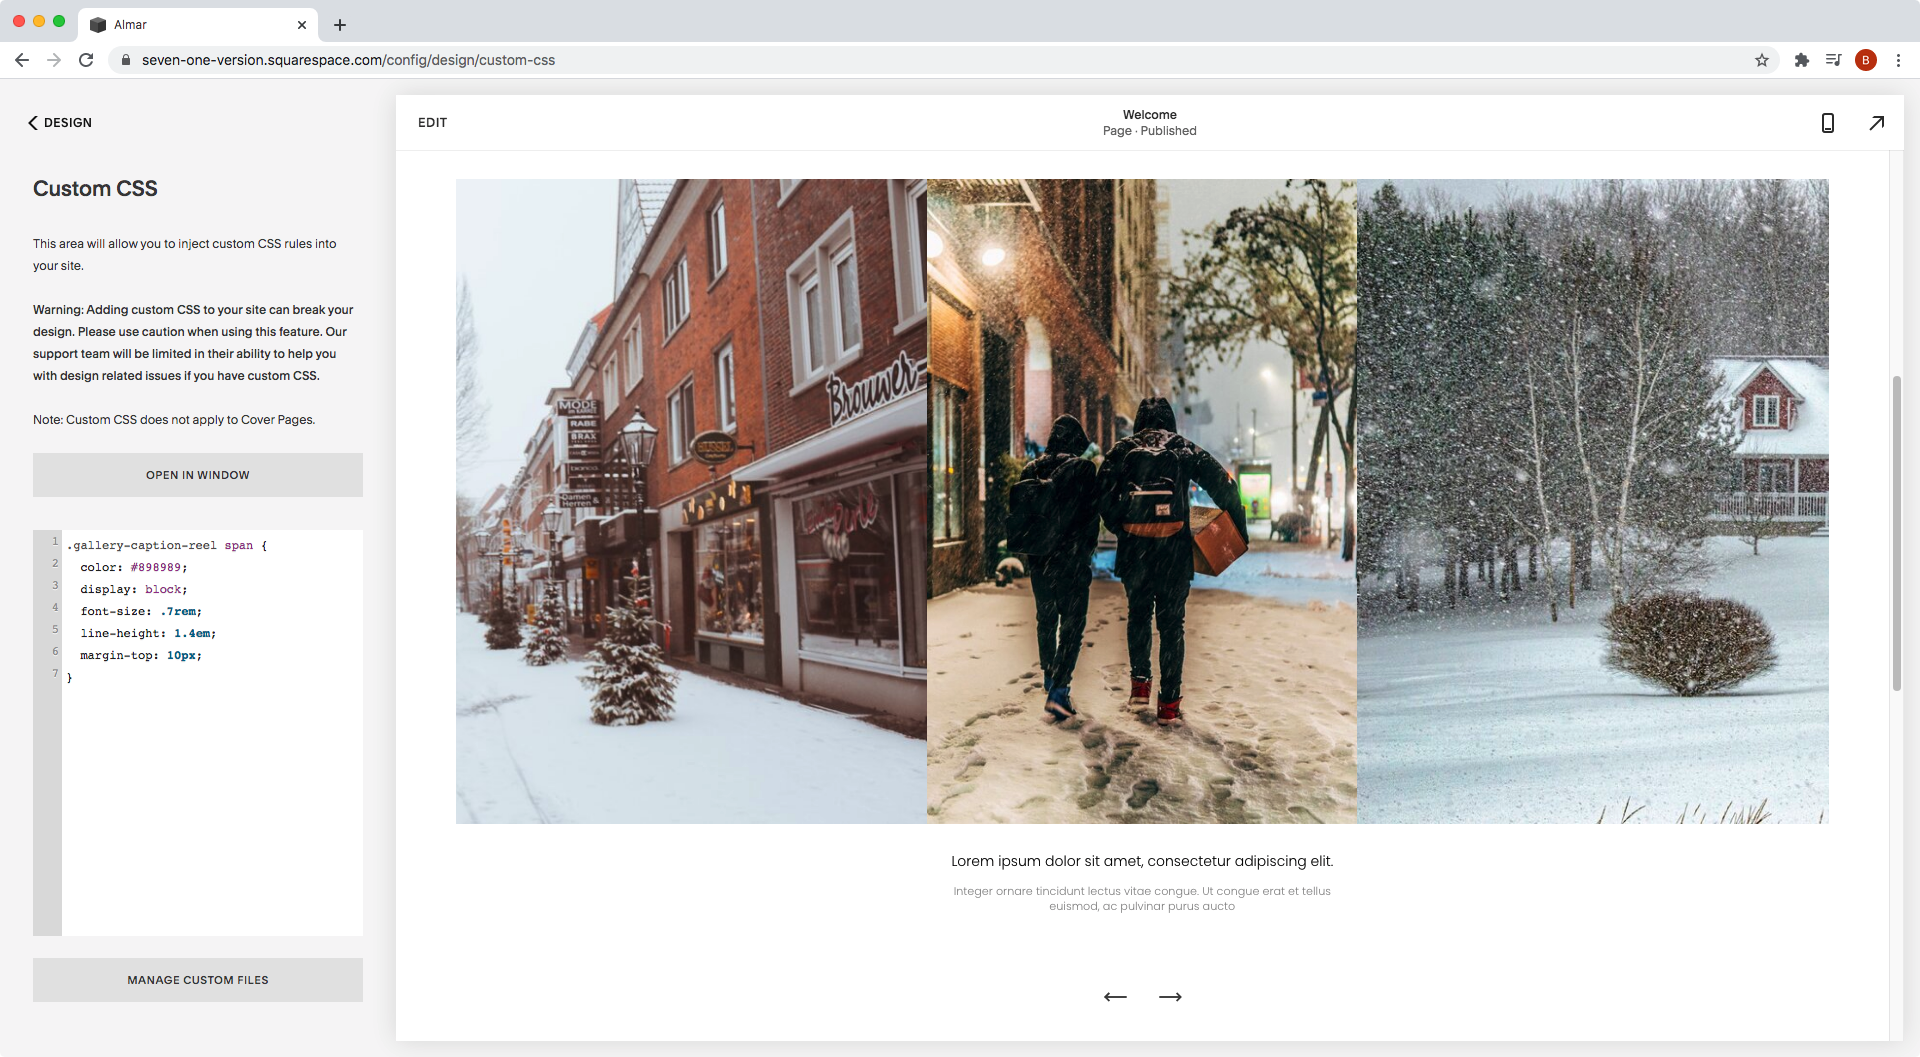
I’ll be changing the font color, size and line-height of mine, but you can change more or less stuff on yours:
.gallery-caption-reel span {
  color: #898989;
  display: block;
  font-size: .7rem;
  line-height: 1.4em;
  margin-top: 10px;
}

Faaantastic!
So, there you have it!
A pretty simple workaround to create a title + description combo, or multi-line description, for your Gallery Section captions in 7.1.
Until next time,
B.
Full code
Grid: Simple
/*MULTI-LINE DESCRIPTION FOR GALLERY GRID SIMPLE (7.1)*/
.gallery-caption-grid-simple span {
  color: #898989;
  display: block;
  font-size: .7rem;
  line-height: 1.4em;
  margin-top: 10px;
}
Grid: Strips
/*MULTI-LINE DESCRIPTION FOR GALLERY GRID STRIPS (7.1)*/
.gallery-caption-grid-strips span {
  color: #898989;
  display: block;
  font-size: .7rem;
  line-height: 1.4em;
  margin-top: 10px;
}
Grid: Masonry
/*MULTI-LINE DESCRIPTION FOR GALLERY GRID MASONRY (7.1)*/
.gallery-caption-grid-masonry span {
  color: #898989;
  display: block;
  font-size: .7rem;
  line-height: 1.4em;
  margin-top: 10px;
}
Slideshow: Simple
/*MULTI-LINE DESCRIPTION FOR GALLERY SLIDESHOW SIMPLE (7.1)*/
.gallery-caption-slideshow span {
  color: #898989;
  display: block;
  font-size: .7rem;
  line-height: 1.4em;
  margin-top: 10px;
}
Slideshow: full
/*MULTI-LINE DESCRIPTION FOR GALLERY SLIDESHOW FULL (7.1)*/
.gallery-caption-fullscreen-slideshow span {
  color: #898989;
  display: block;
  font-size: .7rem;
  line-height: 1.4em;
  margin-top: 10px;
}
Slideshow: Reel
/*MULTI-LINE DESCRIPTION FOR GALLERY SLIDESHOW REEL (7.1)*/
.gallery-caption-reel span {
  color: #898989;
  display: block;
  font-size: .7rem;
  line-height: 1.4em;
  margin-top: 10px;
}