
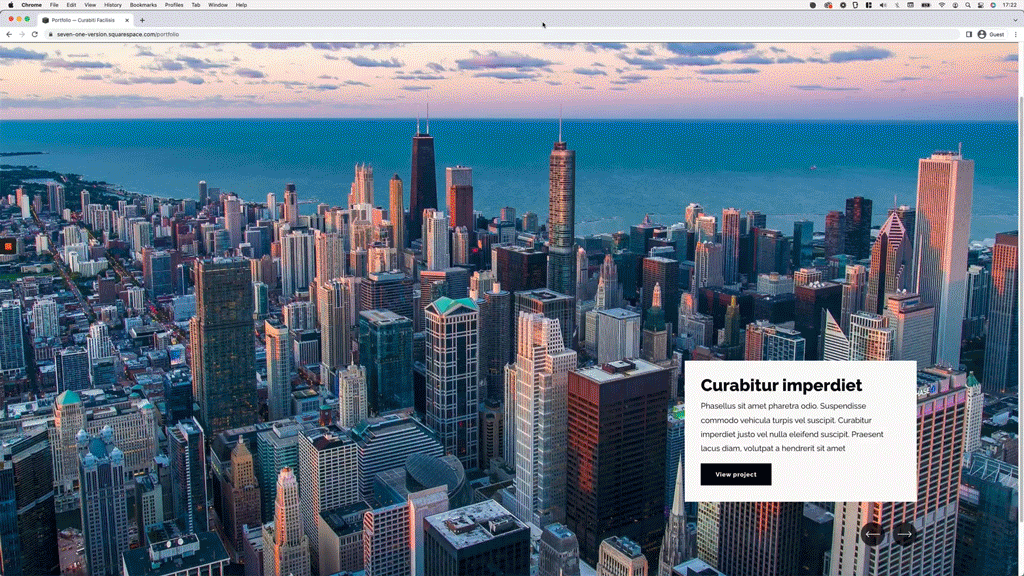
Autoplay and Ken Burns effect for the Auto Layout Banner Slideshow (7.1)
Auto Layouts.
We’ve covered them several times on this blog already because of how versatile they are.
In fact, we just tackled a clickable tweak for the Auto Layout Simple List yesterday!
However, this time, we’re doing something A LOT more exciting…
In today’s tutorial, we’ll not only make the Banner Slideshow autoplay, but we’ll also be creating a super immersive Ken Burns effect that combines both zoom and a little movement on the image to knock the socks off your client!
So, if you’re looking to implement this on your current or next project, check out this awesome trick:
Tutorial
Overview & timestamps
To achieve the entire look of today’s tutorial, we’ll break down the customization in 2 main parts: one covering the entirety of the autoplay functionality, and the other covering the setup and implementation of the Ken Burns animation:
00:00 - Intro
01:11 - Implementing and breaking down the code to make the Auto Layout Banner Slideshow autoplay
Starting out right away with the autoplay, we’ll look into the little script that’s going to help us achieve this functionality and what each part of the code is doing, so that you’re able to modify the timing to fit your needs.03:52 - Breaking down and implementing the Ken Burns effect for the slideshow images
Then, we’ll dive into the actual immersive effect. We’ll focus on the selector needed to target visible slides vs. hidden slides, so that we can apply the resizing and repositioning styles to the right ones to get the final effect we’re going for. Additionally, we’ll include a little bit of a transition to set the time it’ll take the animation to complete, depending on how slow or how fast we want the change to happen.11:54 - Combining the autoplay with the Ken Burns effect
Lastly, we’ll turn the autoplay back on to check out what the combined customization looks like! Spoiler alert: it’s friggin’ awesome.
I hope you find this code breakdown helpful and the effects useful for your next custom Squarespace project.
Until next time,
B.
Full code
jQuery library (if needed)
<script src="https://code.jquery.com/jquery-3.6.0.min.js"></script>
Autoplay (jQuery)
<!-- AUTOPLAY FOR THE AUTO LAYOUT BANNER SLIDESHOW (7.1) -->
<script>
  $(function () {
    window.setInterval(function () {
     $('body:not(.sqs-edit-mode-active) .user-items-list-banner-slideshow__arrow-button--right').click();
    }, 5000);
  });
</script>
KEN BURNS EFFECT (CSS)
/*KEN BURNS EFFECT FOR THE AUTO LAYOUT BANNER SLIDESHOW (7.1)*/
.user-items-list-banner-slideshow .list-item:not([aria-hidden="true"]) img {
  transform: scale(1.1) translateY(50px);
}
.user-items-list-banner-slideshow .list-item img {
  transition: transform 10s;
}
Optional: Ken Burns effect for the 1st slide (CSS)
/*KEN BURNS EFFECT FOR THE AUTO LAYOUT BANNER SLIDESHOW (7.1) - TO ANIMATE FIRST SLIDE*/
.user-items-list-banner-slideshow .list-item:not([aria-hidden="true"]):first-of-type img {
  animation: kenBurns 10s forwards .2s;
  transform: scale(1) translateY(0);
}
@keyframes kenBurns {
  to {
    transform: scale(1.1) translateY(50px);
  }
}